REMAKE: a small keyboard of my own
Getting my Urchin to run RMK apparently wasn’t the end of the keyboard project. Now I have a hardware repository, too.
Meet REMAKE: a 36-key wireless split keyboard designed around RMK, with nice!nano v2 controllers, low-profile Choc switches, and an optional nice!view display on each half. The name has RMK in it. That part of the design was considerably easier than the PCB.

The hardware is on GitHub, and the v0.2 release has the fabrication files, schematic, and PCB renders. There are also two firmware repositories: my personal configuration and a portable Miryoku sample.
One important qualification up front: v0.2 is development hardware, not a fabrication-approved revision. I’m sharing the design and its current state, not announcing a finished kit. The release files being available doesn’t mean the remaining physical checks have been done.
Eighteen keys, twice
Each half has three rows of five finger keys and a three-key thumb cluster. The columns are staggered, the thumbs fan out below them, and the stepped PCB outline follows that shape rather than putting the keys inside a rectangular board.
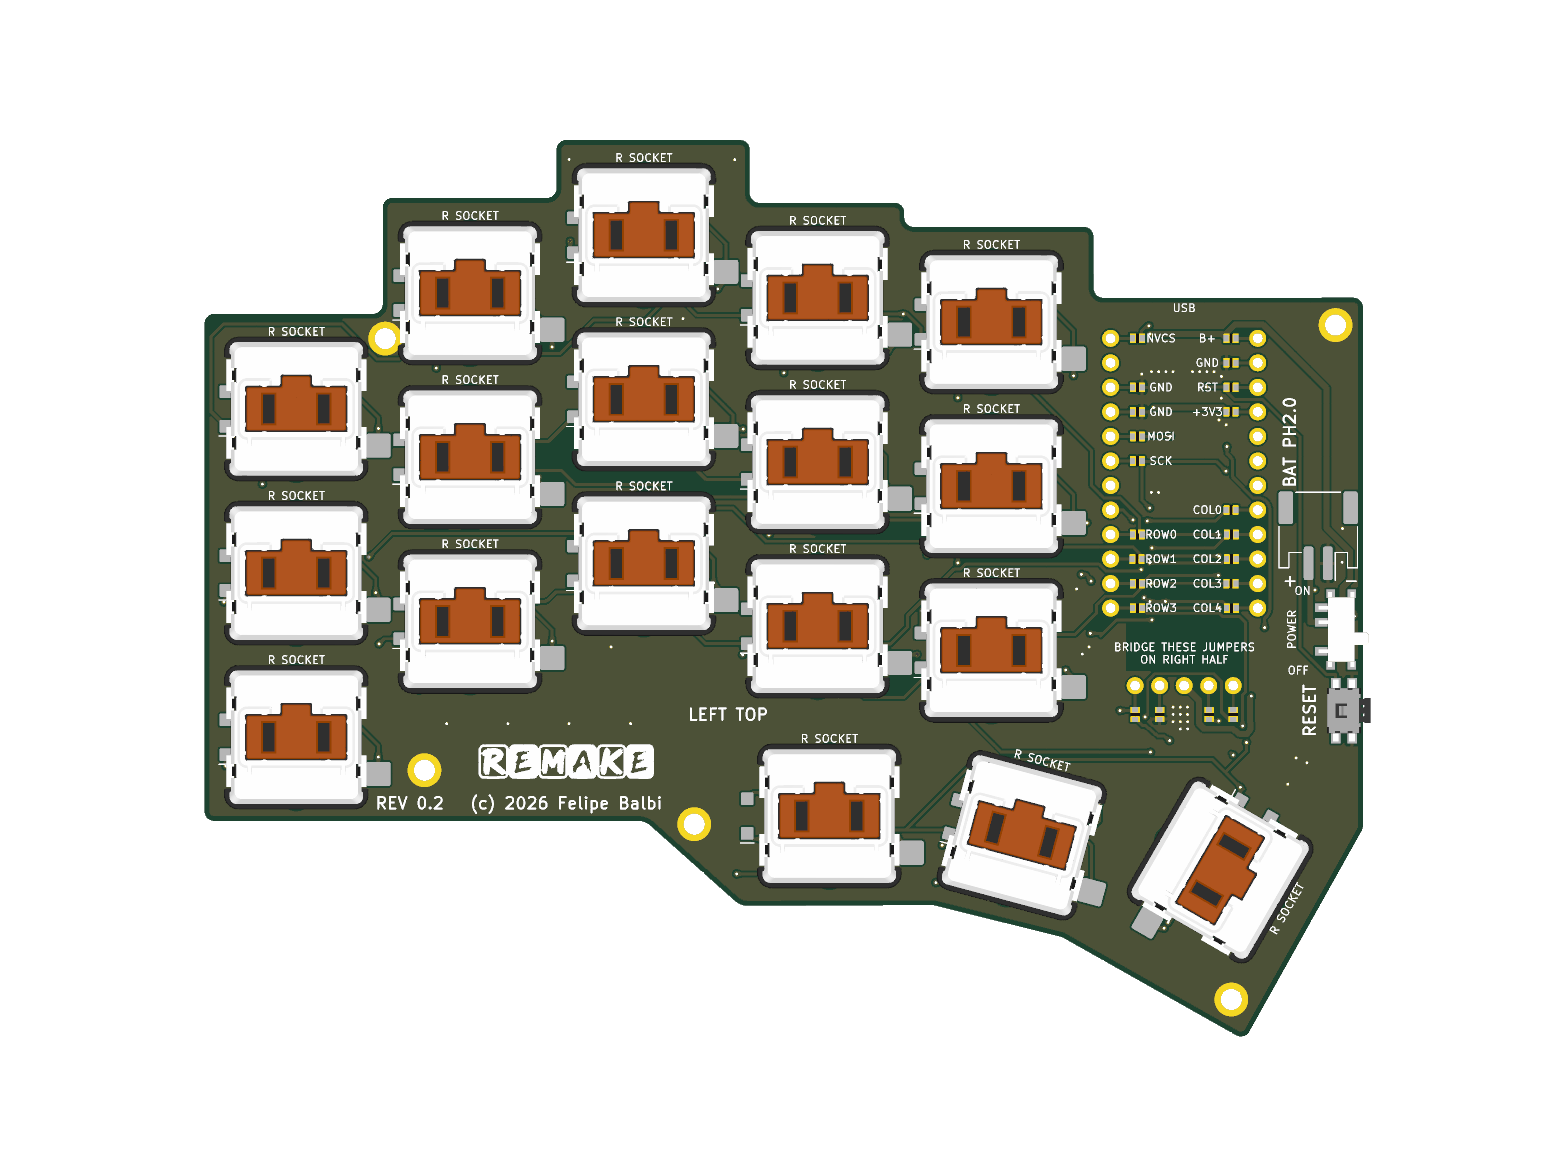
Left half, from the v0.2 release. These are partial PCB assembly renders, not photographs of a completed keyboard.
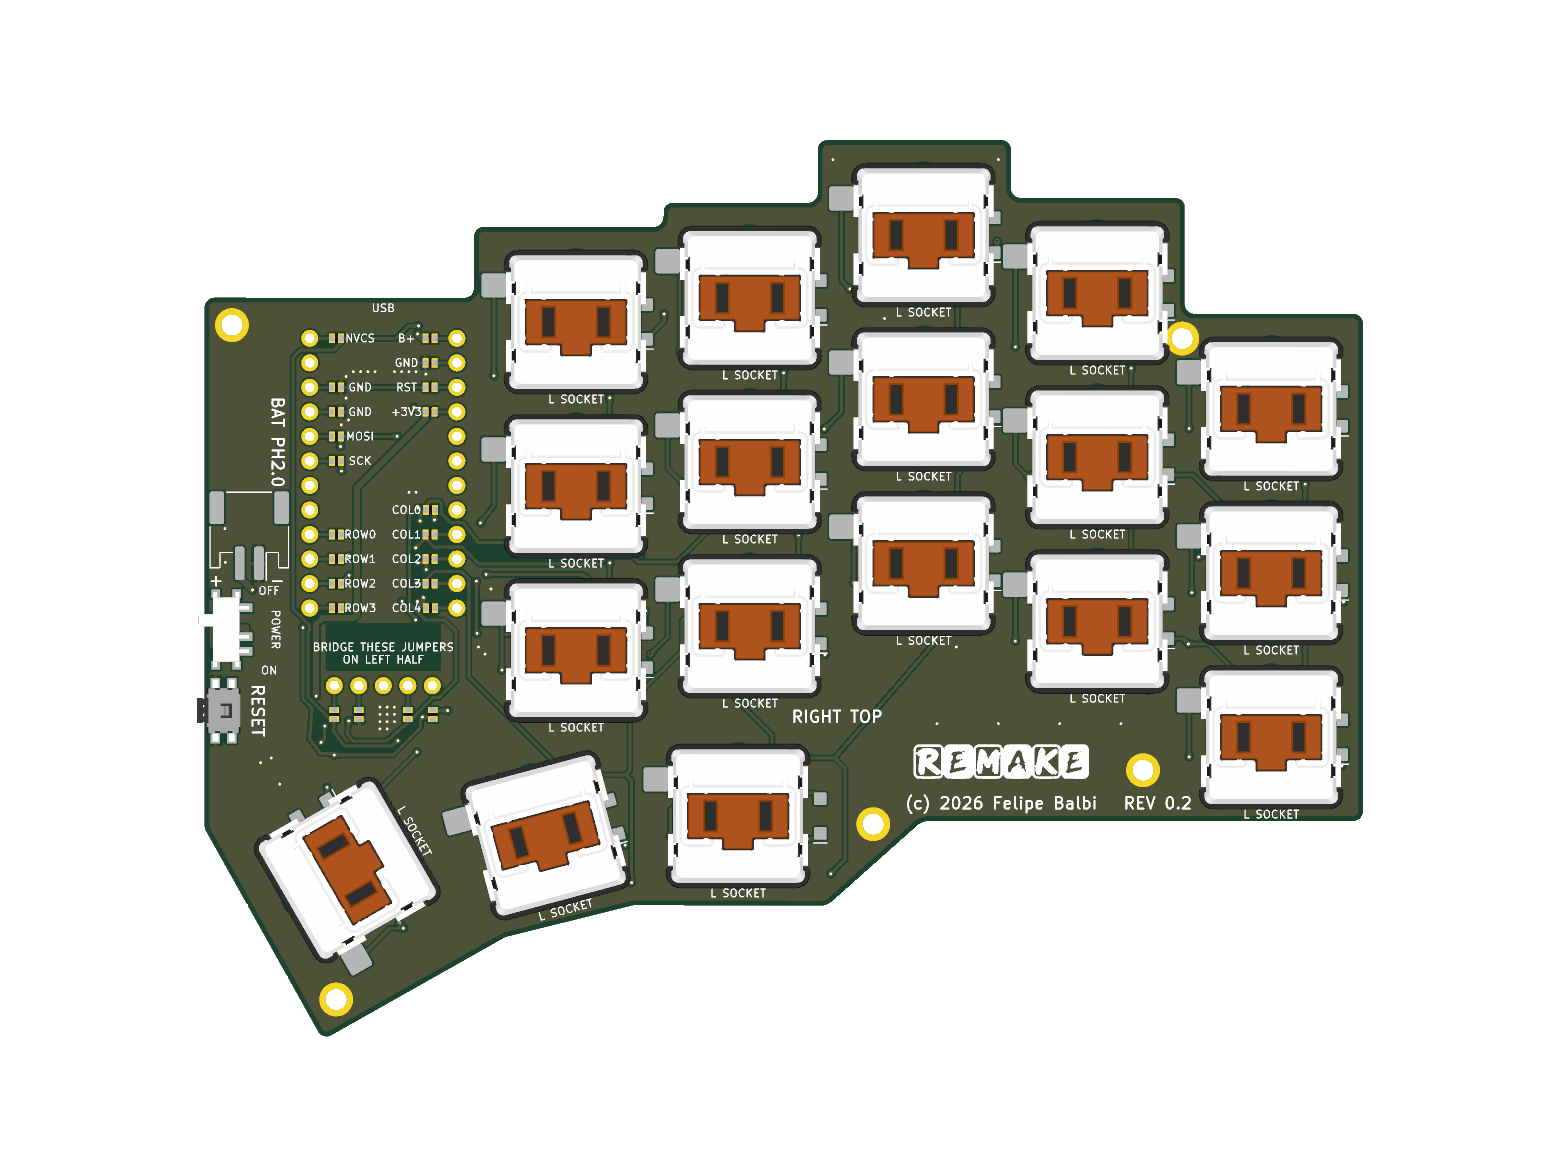
Right half. The same PCB is populated in the opposite orientation.
There is one reversible PCB design, not a separate board layout for each hand. A keyboard uses two identical boards, with one assembled front-side up and the other back-side up. No mirrored fabrication file, panelization, or mouse bites are required.
That does move some complexity into assembly. The controller and display connections use left/right selection links: populate the bank for the half being built and leave the other bank open. Those links accept either 0402 zero-ohm resistors or hand-soldered bridges. Connecting both banks shorts signals, including power and ground. The assembly guide is part of the design, not optional reading after the soldering iron is hot.
The switches are Kailh Choc v1 with hotswap sockets. Most keycaps have a 17.5 × 16.5 mm outside envelope; one thumb on each half uses a longer 26.5 × 16.5 mm cap. Those are actual design dimensions, not a promise that anything sold under a particular unit-size label will fit.
Two firmware starting points
Both firmware repositories use Rust and RMK, with Bluetooth between the halves and USB or Bluetooth to the host. The keymap lives in keyboard.toml, and Vial exposes the 36 physical keys for remapping.
They deliberately aren’t the same configuration.
The one I’m experimenting with
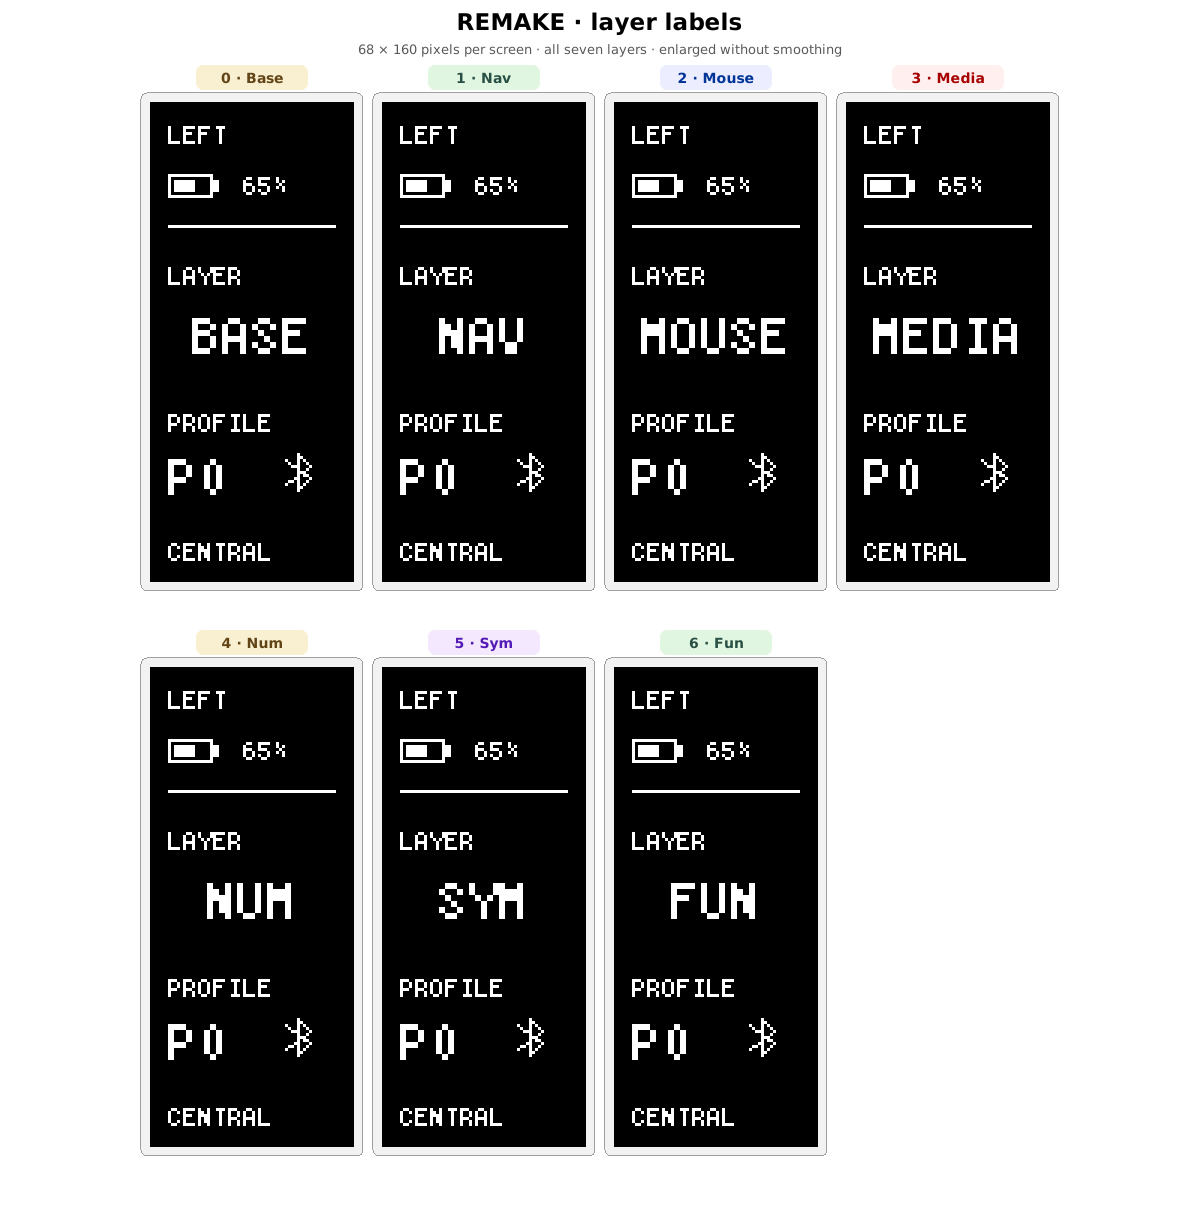
rmk-remake keeps QWERTY alphas and my existing home-row modifier order, while adopting Miryoku’s seven-layer structure: Base, Nav, Mouse, Media, Num, Sym, and Fun. Each of the six thumb keys taps an ordinary key and holds one of the six sublayers. Enter and Space remain on my center thumbs.
This is also where I’m using the ordered tap-hold work from RMK PR #1347. The repository pins a specific revision of my RMK fork rather than tracking a moving branch. Home-row modifiers use permissive hold and same-hand tap filtering; the thumbs have a separate policy. There are four Bluetooth host profiles.
Keeping QWERTY here is intentional. Learning the layer arrangement and changing the alpha layout at the same time would make it harder to tell which part I was struggling with.
The sample that doesn’t need my fork
remake-miryoku is the more portable starting point. It uses released RMK 0.9.x from crates.io, without Git dependencies or local source overrides, and Miryoku’s default Colemak Mod-DH alphas. The manifests allow compatible patch releases; both committed lockfiles currently select RMK 0.9.0. It has the same seven layer names, Miryoku’s thumb arrangement and modifier positions, and four Bluetooth host profiles, BT0–BT3, just like my personal configuration. Media puts the output toggle and those four selectors on the right bottom row; the unsupported RGB positions stay unbound.
This is an adaptation, not a claim of complete QMK or ZMK feature parity. It doesn’t include Auto Shift, layer locks, or the fork-only ordered tap-hold behavior. The README documents those differences and credits Miryoku and manna-harbour.
Both repositories include keymap diagrams and build instructions; the personal repository also has a printable cheatsheet. If you want a starting configuration without my experimental RMK dependency, use the sample. If you want to see what I’m changing for myself, use the personal repository.
A little status, not a dashboard
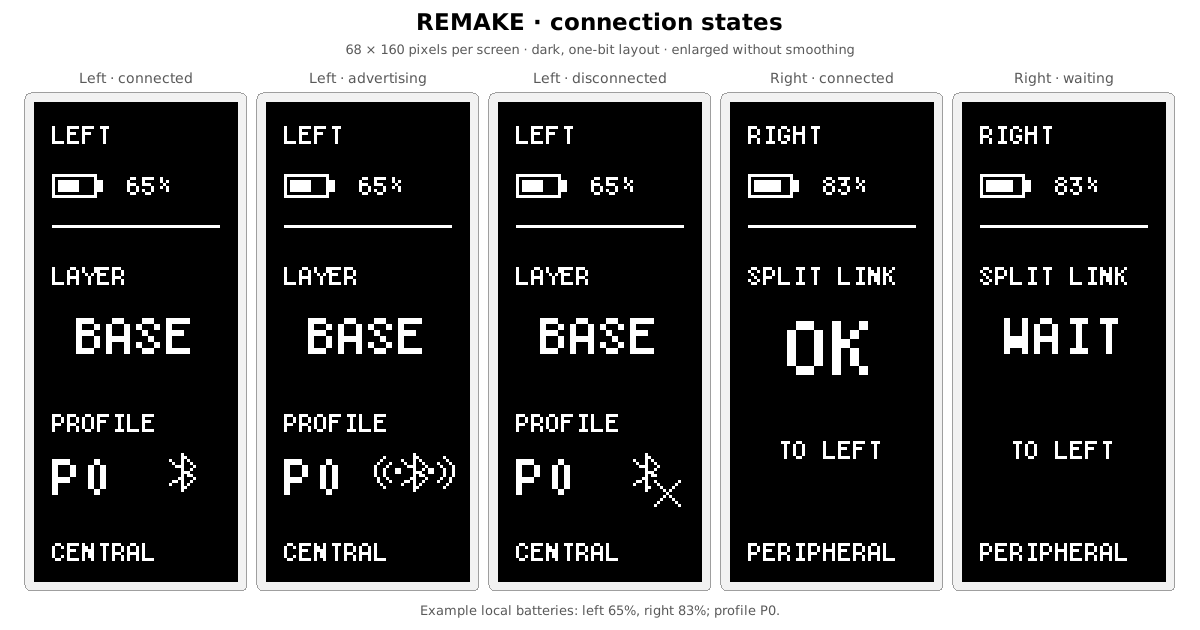
The nice!view screens show battery status and connection information. The central also shows the current layer and host profile; the peripheral shows whether its link to the central is ready. A lightning bolt means local USB power, not a measured charging state.
Both configurations have SVG previews generated from their firmware renderers:
My personal configuration:
Miryoku sample:
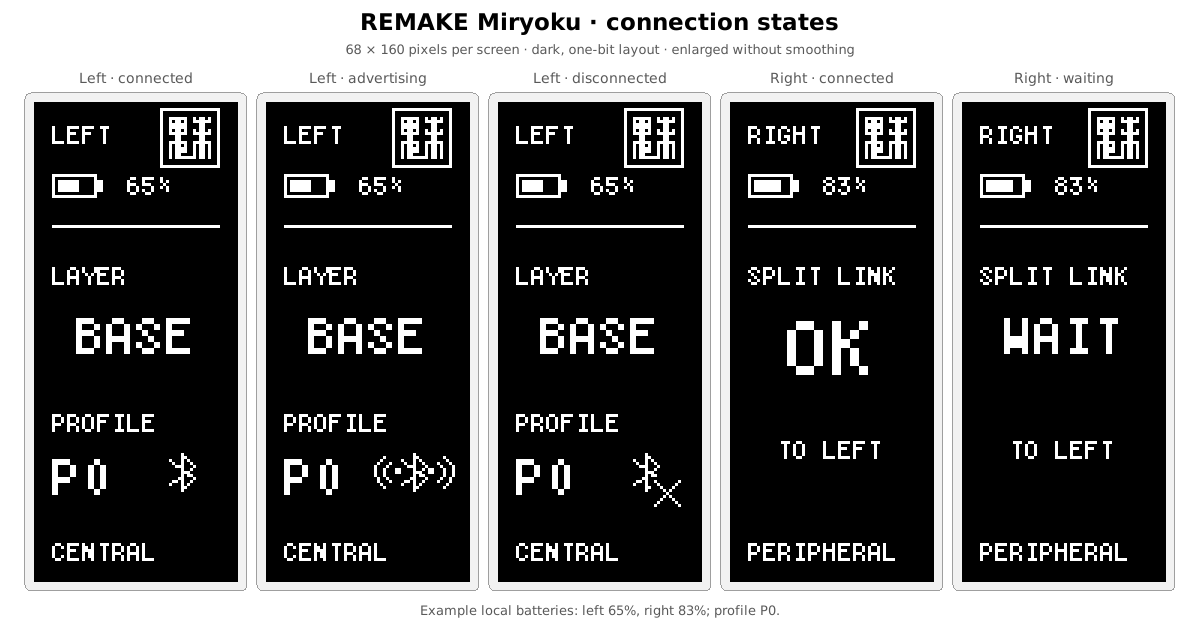
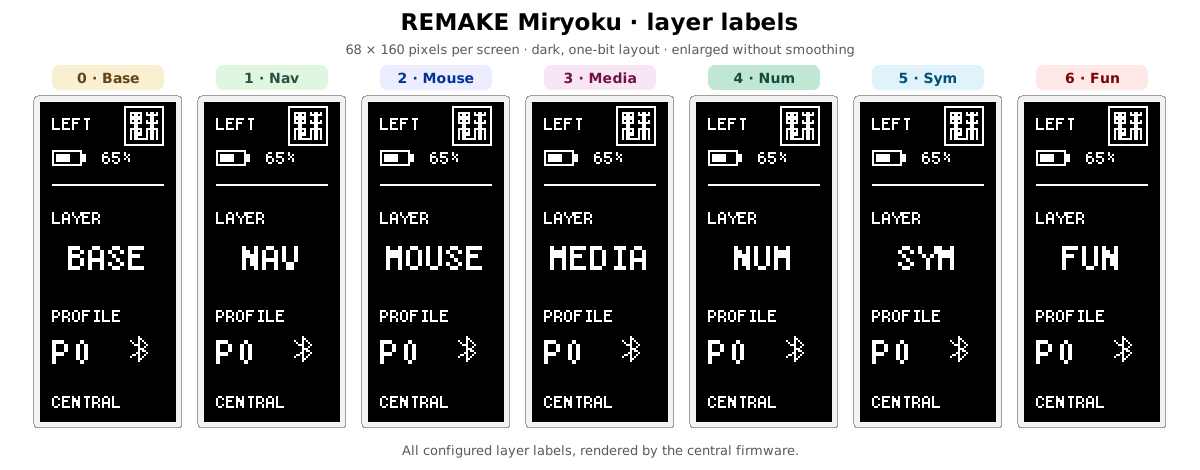
The previews are enlarged for readability; their battery values are examples, not measurements.
After 30 seconds idle, the firmware clears the screens and switches off their supply. On wake, it reinitializes them and redraws the current state. Split-link subrating is enabled to reduce idle radio activity. That is connected sleep, not MCU System OFF.
The firmware repositories have native tests for the keymaps, display rendering, sleep/wake handling, and other behavior. None of that gives REMAKE a measured battery life. The current measurements from my Urchin work belong to that setup; they aren’t a runtime specification for this board.
Bill of materials
Here is the per-half parts list, reproduced from the v0.2 assembly documentation. Double the quantities for a complete keyboard; the nice!view is optional on each half.
| Quantity per half | Part |
|---|---|
| 1 | REMAKE half PCB |
| 18 | Kailh Choc v1 switches and matching hotswap sockets |
| 17 | Keycaps, 17.5 × 16.5 mm outside envelopes |
| 1 | SW17 long thumb keycap, 26.5 × 16.5 mm outside envelope |
| 18 | 1N4148W switching diodes, SOD-123 |
| 18, or 22 with a display | 0 Ω links, 0402 imperial / 1005 metric; manual solder bridges may be used instead |
| 1 | Genuine nice!nano v2 |
| 2 × 12 | Controller socket contacts and matching pins; height must be validated |
| 1 | Optional nice!view and matching five-pin socket/header |
| 1 | MSK12C02 slide switch; exact manufacturer/variant and rating need approval |
| 1 | Panasonic EVQPUJ02K side-actuated, momentary SPST-NO reset switch |
| 1 | JST S2B-PH-SM4-TB, two-pin side-entry SMT, 2.0 mm pitch |
| 1 | Protected 3.7 V, 110 mAh 301230 battery with PH 2.0 connector |
| As needed | Battery insulation and suitable case/plate retention |
This isn’t a fully qualified shopping list yet. In particular, some MSK12C02 variants are rated for only 50 mA, below the nice!nano’s nominal default charging current through that path. The exact switch needs approval; a matching footprint or family name isn’t enough.
The battery also needs its polarity and charging limits checked. A PH 2.0 plug doesn’t guarantee the wiring is correct. The documented PCB connector is pin 1 GND, pin 2 BAT+, and the nice!nano charge-boost jumper should remain open. Socket height, battery insulation, lead clearance, and the final mechanical stack still need verification with the real parts. Read the full assembly guide before ordering or powering anything.
What’s in v0.2
The REMAKE v0.2 release includes:
- The Gerber and drill ZIP,
remake-jlcpcb.zip. - The schematic PDF.
- The left/right PNG renders shown above and separate STEP previews.
- Model-coverage notes and SHA-256 checksums.
The fabrication ZIP contains one PCB design. A complete keyboard needs two copies of that board, not one left and one right fabrication package. It is a bare-PCB export, not a ready-to-order PCBA package with population-selected assembly files.
The renders and STEP files use only redistributable models and omit some geometry. The model-coverage file records those limitations. They are useful previews, but they aren’t proof that a controller, display, battery, keycap, or case will fit.
Routing is complete, the ground pours are filled, and the outline is closed. Physical keycap travel, production tolerances, the component choices above, and the assembled mechanical and radio behavior still need validation. Passing CAD checks is useful evidence about the CAD. It doesn’t finish the keyboard.
The hardware is licensed under CERN-OHL-S-2.0. If you’re interested in manufacturing boards or kits, there is a manufacturing and sales issue template for that conversation. Commercial manufacture is permitted under the licence; getting in touch isn’t an extra permission requirement.
For now, the design, firmware, and release exports are there to inspect. The next important results need to come from the physical assembly, not another render.
I’ll post an update once I have the keyboard assembled, with photos and how it feels to actually type on it.